Halo as a franchise has a long history of hiding items for players to find. Whether that be secret weapons or developer easter eggs, they are always there waiting for a curious gamer to find. In this article, we will be helping you find all 12 Halo Infinites Skulls.
Halo Infinite has 12 skulls for you curious gamers to find. Each one of the skulls has a different modifier that affects how your campaign plays. In this article, you will learn the locations of each skull, and how they affect your game when active. Some are more tricky than others, but whether it's the Catch Skull or Grunt Birthday Party Skull you're struggling with, we got you.
NOTE: Some of the Halo Infinite skulls are only available during certain missions, and cannot be claimed upon mission completion, if you missed a skull you will have to start a new campaign.
Halo Infinite Skull List
There are a total of 12 Halo Infinite Skulls to collect.
- Boom Skull
- Cowbell Skull
- Catch Skull
- Fog Skull
- I Would Have Been Your Daddy (IWHBYD) Tower Skull
- Blind Skull
- Thunderstorm Skull
- Black Eye Skull
- Famile Skull
- Mythic Skull
- Grunt Birthday Party Skull
- Bandana Skull
#1 Boom Skull
NOTE: This skull is part of a campaign mission and can be missed. If you miss the skull you will have to claim it in another campaign.
Location: Mission 1 - Banished Warship Gbraakkon
Effect: Doubles the explosion radius of all explosions.
To find the boom skull you must be in the room with two floors and moving elevators on the side. On the right side of the room, there will be crates with weapon caches inside of them. You will want to go up the elevator next to the left crate. Go up the elevator and your skull will be waiting for you on another platform.
#2 Cowbell Skull
NOTE: This skull is part of a campaign mission and can be missed. If you miss the skull you will have to claim it in another campaign.
Location: Mission 2 - Foundation
Effect: Acceleration from all explosions is increased.
To get the cowbell skull you have to come to this wide-open room that is preceded by the large circular elevator and memory of Cortana. Clear the room of Jackals and Grunts so you aren't interrupted. Next, use your grapple shot to get up onto the first or second pillar. In my case, I used the first. Once you're up, grapple to the dark beam in the middle of the ceiling, and your skull will be waiting for you to claim it.
#3 IWHBYD Skull
Location: Open World - The Tower
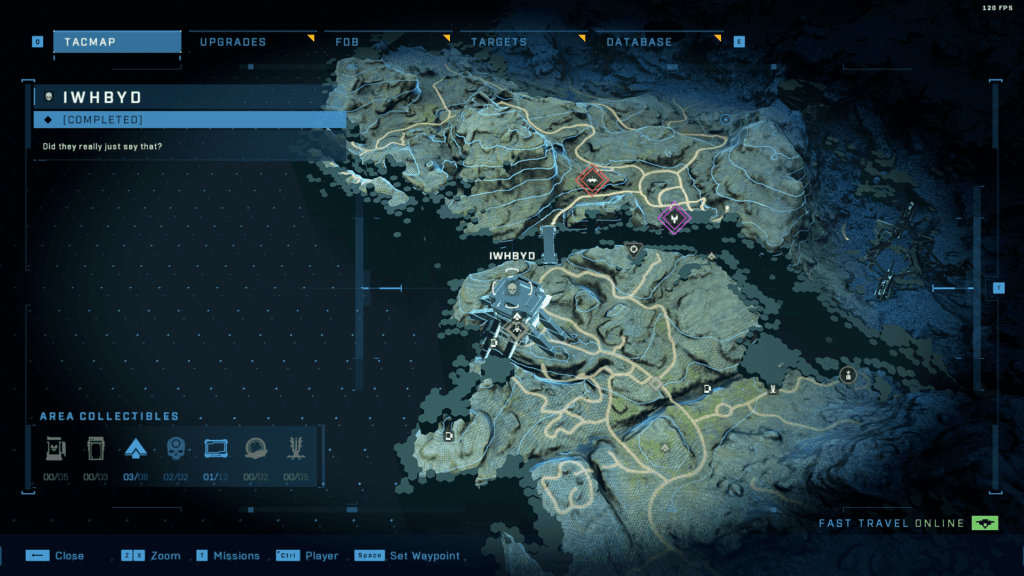
Effect: Rare combat dialogue becomes more common.
To get the IWHBYD skull you will need to climb Chak 'Lok's tower. This is much easier if have your grappleshot upgraded twice to allow for a quick cool-down. You will need to grapple as high as you can then use your momentum to swing to the top. Once you reach the top the skull will be waiting for you in the center.
#4 Blind Skull
Location: Open World
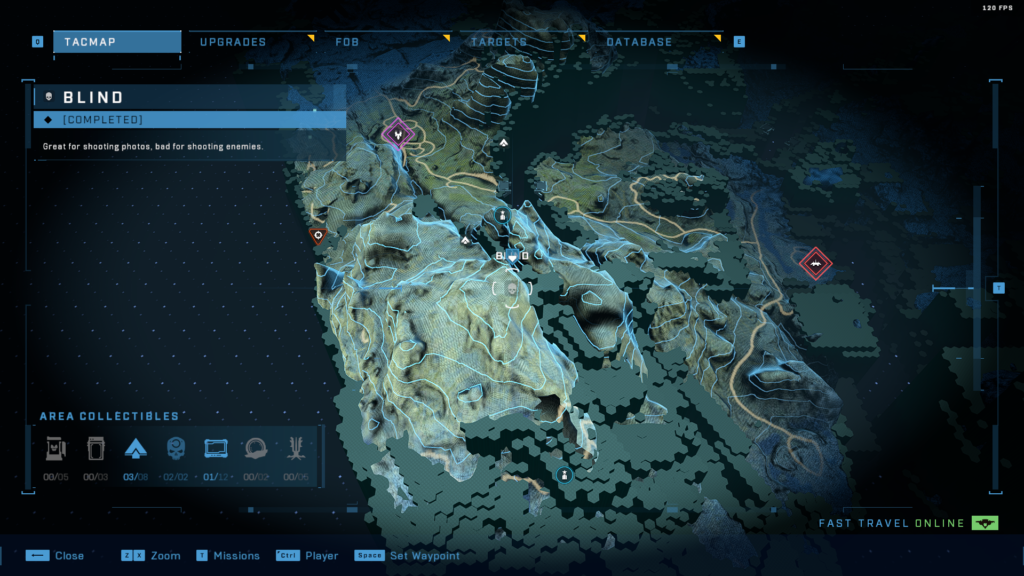
Effect: HUD and weapon view model do not show on the screen.
To get the blind skull you will have to jump down into the chasm as seen in the video. Look for a blue shine on the metallic foundation of the ring fragments, and jump to it. Find the side where the reflection is coming from, and grappleshot to it, and your skull will be waiting for you there.
#5 Catch Skull
Location: Open World
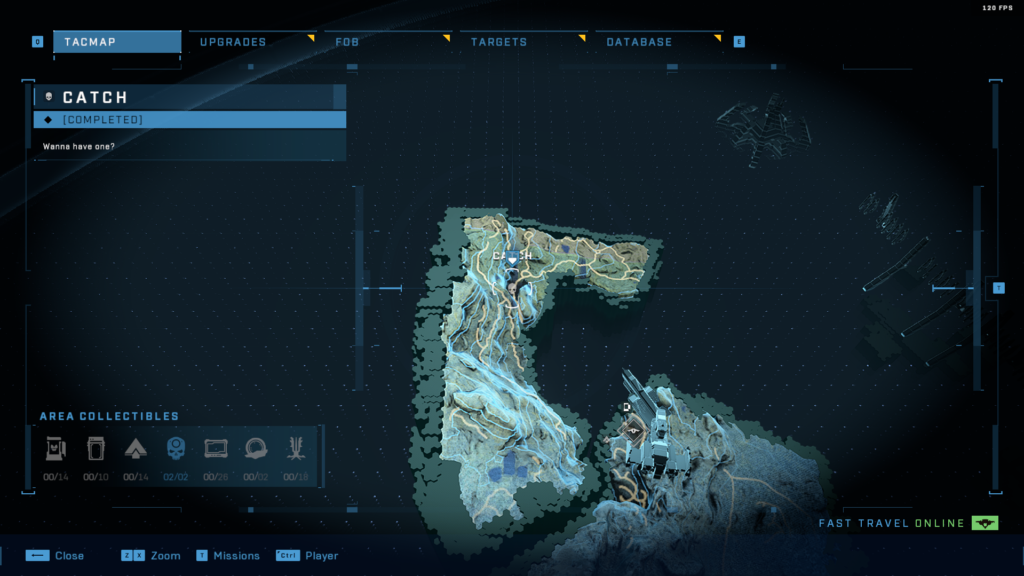
Effect: Enemies drop and throw more grenades.
To claim the Catch Skull you will have to travel to the northernmost island on the map, which is easily accessible via grappleshot. Head across from Outpost Tremonius and head north until you meet a canyon. The skull will be inside a dead tree waiting to be claimed, it is however guarded by hunters and snipers, so you may want to make some heavy weaponry. The Catch Skull is one of the more trickier Skulls to find, so don't be disheartened if it took you a while.
#6 Fog Skull
Location: Open World
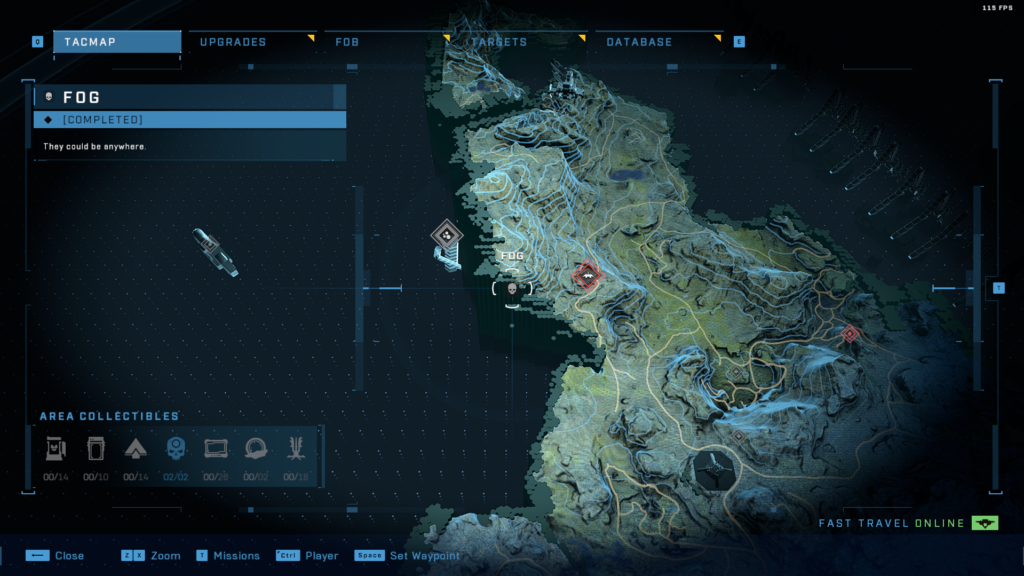
Effect: Disables your motion tracker radar.
You can find this skull just to the west of FOB Alpha. You will want to be sure you have your grappleshot upgraded for faster cool-downs just to make life easier. To get there you need to walk along the cliffside heading west until you reach the edge made of hexagonal pillars. Round the corner under the mountain and scan and look upwards. Use the grappleshot to swing onto the pillars and then into the opening platform. Your skull will be waiting for you in a pile of helmets.
#7 Famine Skull
Location: Open World
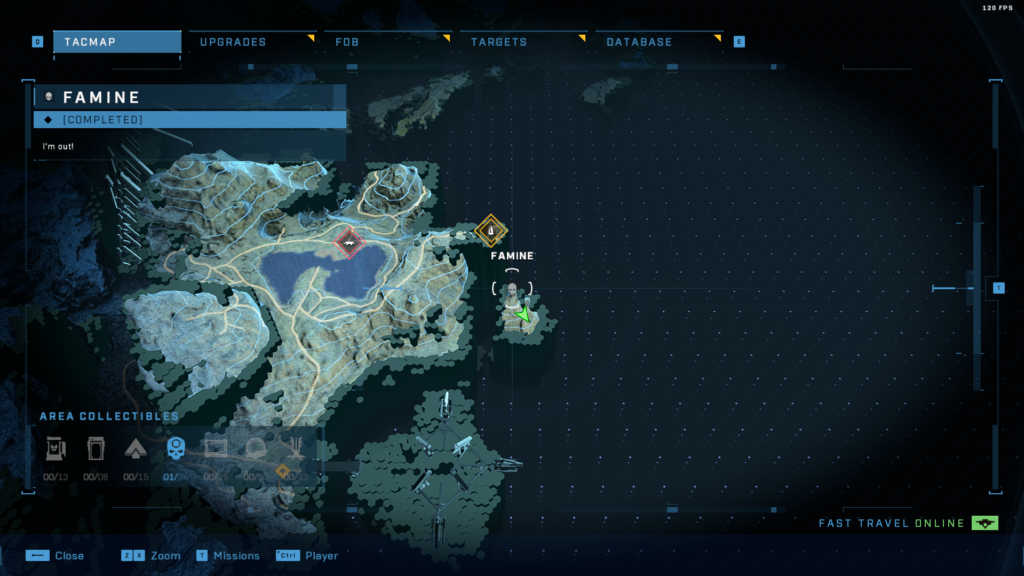
Effect: Weapons dropped by enemies have half the ammo they normally would.
This skull is easiest claimed during the open world mission, The Sequence. To get the skull you should steal a banshee, or summon a wasp at a FOB if you have it unlocked. Simply just fly across the divide between the mainland and the small island. The skull will be closer to the top on a hexagonal pillar next to a dead gold elite.
#8 Black Eye Skull
Location: Open World
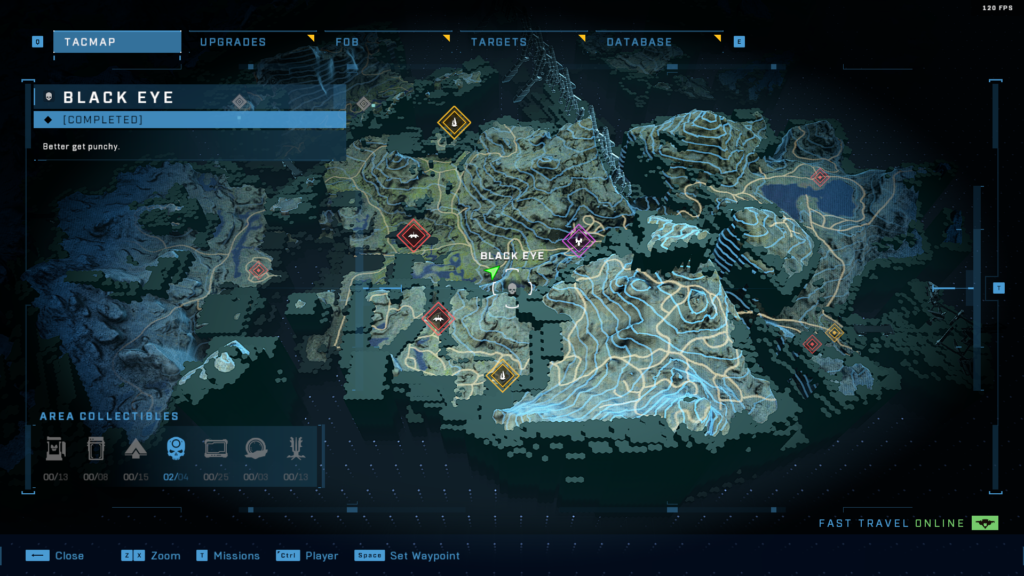
Effect: Your shields only recharge when you melee enemies
The black eye skull can be found at a lake between FOB Kilo and Riven gate. Go to the base of the waterfall at the lake and look upwards, about midway up the waterfall is a small opening to a cave. Grappleshot up to it and crouch-walk inside. Your skull will be waiting for you inside.
#9 Thunderstorm Skull
Location: Open World
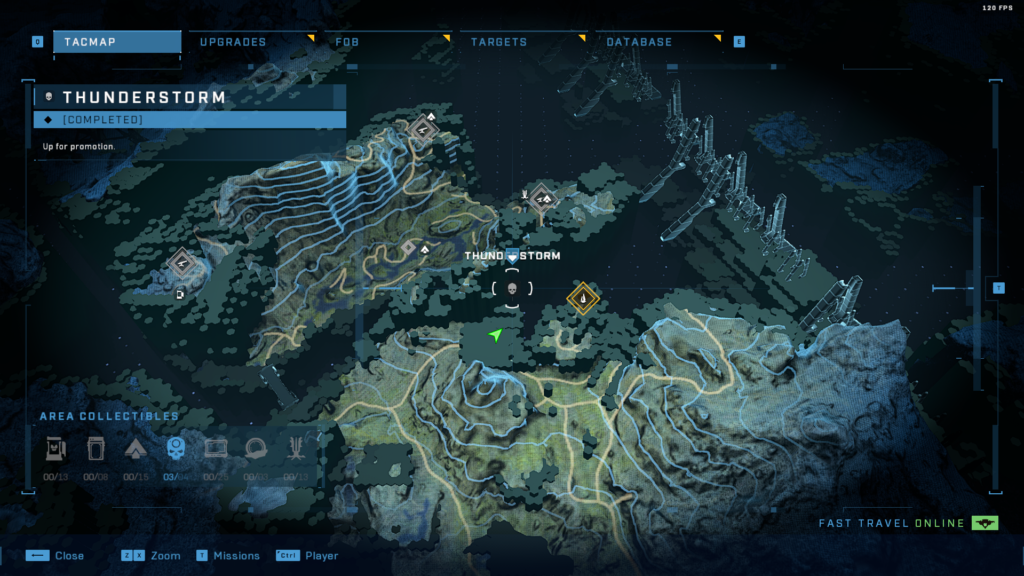
Effect: Upgrades the rank of most enemies.
The Thunderstorm Skull is atop a hexagonal pillar near a tall, slim peak, just east of the northernmost beacon. Simply use the grappleshot to get to the top and you will find your skull waiting for you at the top.
#10 Mythic Skull
NOTE: This skull is part of a campaign mission and can be missed. If you miss the skull you will have to claim it in another campaign.
Location: Mission 11 - The Command Spire
Effect: Enemies have increased health.
You will come across this skull's location in a much larger room after several pillar processing rooms. This room will have pillars pivoting to the right. To get to the skull grapple a the pillar before it leaves the room and grapple onto one of the ledges above. Your skull will be on the very next level inside a door.
#11 Grunt Birthday Party Skull
NOTE: This skull is part of a campaign mission and can be missed. If you miss the skull you will have to claim it in another campaign.
Location: Mission 12 - Repository
Effect: Headshots on grunts cause a grand explosion of confetti and cheering.
This skull is rather complicated, as it requires multiple steps to claim it. After you receive the message from the terminal in the middle of the room, you need to grapple to the beam on the right side of the door you entered in. This will take you to a platform and another door which will lead you to a power seed.
Once you have the power seed you need to grapple back to the main platform. Next use the grappleshot to make your way to the platform on the right side, which has a door that leads to the power seed socket. Insert the seed and that is the first step done.
Next, make sure you have some good weapons because you're in for a fight. You will enter a room with two identical beams right next to each other and a window above it, enemies will spawn so clear them before you attempt the skull. Next grapple up to the window which should be open because of the power seed. There will be active camo elites with energy swords that will attack you when you move for the skull. Kill them and the skull is as good as yours.
#12 Bandana Skull
NOTE: This skull is part of a campaign mission and can be missed. If you miss the skull you will have to claim it in another campaign.
Location: Mission 15 - Silent Auditorium
Effect: Infinite ammo.
DO NOT KILL ANY SENTINELS IN THIS MISSION, OTHERWISE, YOU WILL NOT BE ABLE TO CLAIM THE SKULL AND WILL HAVE TO START THE MISSION OVER. This skull is found at the very end of the mission right before you use the last elevator. There is a door on the right side of the room with a short light bridge that leads to it. Proceed through the door on the right side and the hall that it leads to, and on a platform you will find your skull.
With that, you now have all the skulls in Halo Infinite and are now able to do some pretty wacky things in-game, or just give yourself more of a challenge. Stay tuned esports.gg for more Halo Infinite news and content.