
This updated(!) Hearthstone Mercenaries Leveling Guide for Protectors hopes to serve you as a hub of information: something you can return to. A map for each Protector--including how to spend their earliest Coins and complete their most important Tasks.
I’m not going to tell you who to play. That is, in my opinion, one of the best parts about Mercenaries PvP: passion- and skill-expression is at an all-time high here. This Hearthstone Mercenaries Leveling Guide is to give you the tools to decide yourself!
You can take the iconic characters you love and actually make them sick, no matter what. You don’t need Rogue to be meta, you don’t need to rely on a good Mini-set to be able to play your deck– you just have to pick up three colors and start painting.
This guide hopes to serve you as a hub of information: something you can return to. A map for each Protector–including how to spend their earliest Coins and complete their most important Tasks. Welcome to my Hearthstone Mercenaries Leveling Guide for Protectors!
Mercenaries wasn’t even out for 24 hours and the requests came flooding in:
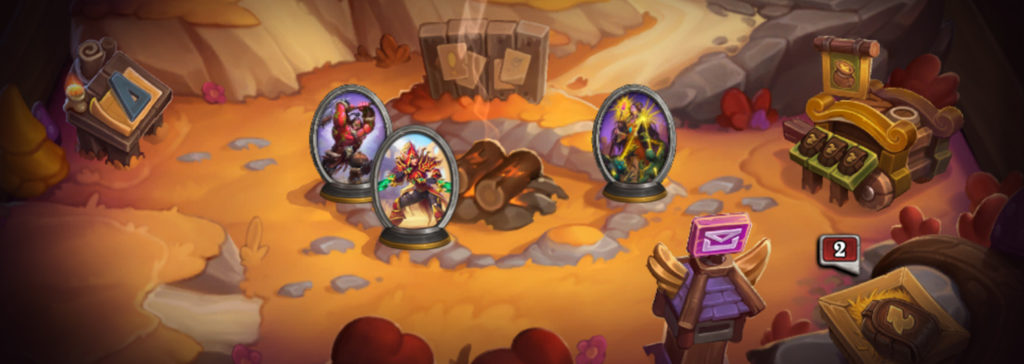
“How do I spend my Coins? Which choice do I make for Mysterious Stranger? How do I get there? Where am I?”
All of the Mercenary-specific progression, who you choose to gear up and why, revolves around Coins, Tasks, and Time. Resources that, if mismanaged, are gonezo (for a while) until you find more of them. When “finding more of them” involves randomness, a lot of time, or Human Dollars, you want to make sure to slurp up every little drop you can.
Getting ~30 coins for a specific Mercenary involves:
- Finding the Bounty on the map that gives your specific Merc’s Coins when completed (hope it isn’t Blackrock!),
- Leveling up a party enough to grind it,
- And then doing it over and over in runs that could take 10 or 15 minutes a piece!
- Alternatively, just do Tasks– each one rewards a lot of Coins for that Merc– even Packs at Task 16, 17, and 18!
How to use this Hearthstone Mercenaries Leveling Guide for Protectors
Making the best decisions in the early game will let you play the strongest versions of your Mercenaries as comfortably as possible. Spending 125 Coins to level up your second Ability just “because I have the Coins to…” might literally throw away hours of your time.
This guide focuses on the early game because, after a certain point, you’ll understand which things you’ll personally want to focus on. Your collection dictates almost every direction you might want to take, so everyone’s comps will be different. Follow these steps to make getting to that point as smooth as possible. Eventually you will level up everything– but for now, just begin your grind. How to spend each Mercenary’s first 300 Coins or so will be detailed below.
Note!!! This is heavily slanted towards gearing for PvP– you can basically full-clear the PvE with anything, these strategies included, but keep in mind that this is considering Mercenaries PvP as a priority. That being said, the first few Abilities you put Coins into tend to be those that help you grind the PvE as efficiently as possible. I’ve combined both sides into the making of this Hearthstone Mercenaries Leveling Guide and present to you the best decisions that will satisfy both playstyles.
The Protectors: Everything You Need to Know

Alexstrasza
Best Equipment: Alexstrasza’s Brooch (Task 2)
Coin Farms: Icehowl (3.5) [notation: Winterspring, the third Zone (3) for Icehowl, the fifth fight (.5)], Chrommagus (4.12)
Alex synergizes best with Dragons (Voone and Brightwing). She’s sneakily a very effective Merc– having a Heal and a Fireball on one ability is nice, her Dragon-centric AoE is powerful, and Dragonqueen’s Gambit is still widely unexplored as the hard ‘Fighter-Counter’ it could be. If you open her without any other Dragons, look for opportunities to be combined with Fire-types like Ragnaros, Baron Geddon, and Antonidas.
Coins Spend-Path:
- Step 1: Dragon Breath 2 (50 Coins)
- Step 2a: Are you playing with another Dragon? Flame Buffet 2 (50 Coins)
- Step 2b: No Dragon? Dragon Breath 3 (125 Coins)
- Step 3: Make sure you have Dragon Breath 3 (125 Coins)
Task Priority: Medium– Her Task 2 Equipment, Alexstrasza’s Brooch is the best option and easy enough to get. She can get it early, so if you can quickly spend Tasks on her then it’s a great damage/healing boost, but this isn’t a critical part of any of her comps.
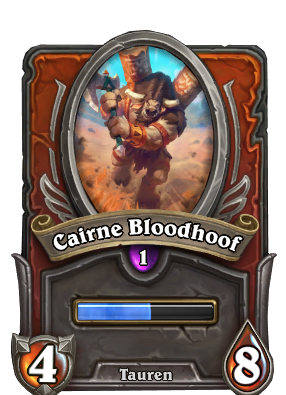
Cairne Bloodhoof
Best Equipment: Reincarnation (Level 30)
Coin Farms: High Justice Grimstone (4.2)
The first Mercenaries tournament helped showcase just how sick Cairne is– now a classic combo is his Endurance Aura into Diablo’s Fire Stomp, going off at 3 Speed and super-AoE-ing down entire boards.
As time went on it became clear– Cairne is busted. He speeds you up, slows them down, tanks and taunts up– he really does it all. It’s like there was one piece of Legendary gear that dropped from the PvE content, and it was Cairne-Diablo. Together they form an almost mandatory backline at the moment for a number of comps, from Shadow Samuro to Jaina-Varden-X. No Hearthstone Mercenaries Leveling Guide would be complete without letting you know that Cairne is potentially Public Enemy Number 1– get ready to see a lot of cows.
Coins Spend-Path:
- Step 1: Earth Stomp 2 (50C)
- Step 2: Earth Stomp 3 (125C)
- Step 3: Endurance Aura 2 (50C)
Task Priority: Zero! Reincarnation is best for Cairne by a Barrens mile, and you get it just for hitting level 30. Never take a Cairne Task early until you’re bored (or need Coins.)
Cariel Roame
Best Equipment: Tome of Light (Task 2)
Coin Farms: Air Elemental (1.2), Sunwalker Proudhoof (1.5), Barak Kodobane (1.6), Snowclaw (3.1)
Cariel was the “best” Turn 1 taunt in the game. She stopped aggressive openers immediately, Taunting at 1 Speed with no Cooldown, and hitting back for up to 18 Retaliation damage per hit thanks to Tome of Light. But then they buffed Cornelius to allow him to taunt on Turn 1 as well, and he completely stole her position.
Still, a well-placed Deathblow from her Crusader’s Blow and Cariel be back up to full health in no-time, even healing back up from negative health. She actually performs pretty well in PvE and is worth including in your F2P comps because she can guarantee damage onto the creeps that tell you they’re going to attack. In Mercenaries PvP you should still look towards Cornelius or Mukla for better Turn 1 Taunts.
Coins Spend-Path:
- Step 1: Crusader’s Blow 2 (50C)
- Step 2: Get Tome of Light 1 (Task 2 Equipment)
- Step 3: Taunt 2 (50C)
- Step 4: Taunt 3 (125C)
- Step 5: Tome of Light 2 (100 Coins)
Task Priority: High– Tome of Light is your Task 2 Equipment and undeniably her strongest asset. Without it she’s quite bad, because Taunt on 1 is one of her most important play patterns in PvE and PvP. An extra +8 Attack lets you convert your “Anti-Aggro Counterspell” into something that smacks back, as well as letting you clear early Bounties quickly.
Cornelius Roame
Best Equipment: Shield of Dawn (Task 7)
Coin Farms: Air Elemental (1.2), Sunwalker Proudhoof (1.5), Icehowl (3.5)
Cornelius was unplayable– and then they removed the Cooldown from his Hold the Front Taunt and now he’s absolutely everywhere. Cornelius singlehandedly enabled a whole new range of Control deck that does an amazing job at protecting two other Mercs for one, two, even three turns in a row.
Whether it’s beside Jaina + Varden or Anduin + Velen, Cornelius often pairs up with squishy threats that scale out of hand quickly. Unfortunately you really want his Task 7 Equipment, so even if you have a million Cornelius Coins from farming earlier, you still need to go do his Tasks.
The cutest, coolest combo with Cornelius is Mr. Smite + Rokara. Mr. Smite’s Overboard ability lets him attack every time your allies take damage, and Cornelius can use Blessing of Sacrifice to redirect the retaliation damage Smite takes. This begins a loop where, until Cornelius dies, Mr. Smite attacks and grows over and over– especially when Rokara casts Offensive Rally, pumping Smite +5/+10 every time. It isn’t uncommon to end the combo turn (Turn 2) with a 50/200 Smite!
Coins Spend-Path:
- Step 1: Hold the Front 2 (50C)
- Step 2: Hold the Front 3 (125C)
- Step 3: Start leveling Blessing of Sacrifice to get it as Fast as possible (50C+)
Task Priority: High– Shield of Dawn, his Task 7, guarantees damage reduction, and in the best way possible. In Mercenaries, things that say “Reduce Damage by X” is calculated before Crit multipliers, so even if Cornelius is going to get crit by a Caster for 12, it actually only ends up dealing 18 damage. All Cornelius cares about is living as many turns as possible while helping out his friends!
Garrosh Hellscream
Best Equipment: Tusks of Mannoroth (Level 30)
Coin Farms: Yeti Hunter Ranel (3.2)
Get huuuge! Garrosh’s capacity to stack health by spamming Horde Strength is unrivaled. He can represent a nearly unkillable threat in the late-game of PvP. He can be combined with Uther to create a giant taunted Orc Wall, buff-up in Orc Comps, or just be a Mercenary that will out-last the competition.
Be wary of enemy comps with too many Casters that could threaten his scaling– pair him with Fighters that can lead out and eliminate the threat to his giant booty.
Coins Spend-Path:
- Step 1: Battle Shout 2 (50C)
- Step 2: Horde Strength 2 (50C)
- Step 3: Horde Strength 3 (125C)
Task Priority: Zero! Tusks of Mannoroth, the juiciest health-buff-Equipment in the game, is his Level 30 Equipment! Rest easy, but do try to get this before you take him into PvP. The whole point of Garrosh is to be a massive, self-heal-spamming Tank. He ends up gaining over 40 or 50 health per activation of Horde Strength!
Grommash Hellscream
Best Equipment: Bloodthirst Amulet (Level 30)
Coin Farms: Raven the Hunter (2.1), The Anointed Blades (2.2), Majordomo Executus (4.6)
Gromm is the Cornelius of Orcs– and even after both got changed, he still is! In the same patch that buffed Cornelius into playability, Gromm leapt up the charts as well. Staggering Slam, his point-and-click Slow, got brought down to a Two Speed ability, meaning it’s the fastest Muddy Footing in the game. This now gets under Vol’jin, Xyrella, Bru’kan, and sometimes even Cookie! Because of that Gromm has started seeing a ton of play as a Samuro enabler, and one that beats out the other Samuro enablers in semi-mirrors.
Battlefury, once a 9 Speed Cleave, is now all the way down to a very reasonable 6 Speed, which starts to mirror Thrall. You rarely click this button, but it at least feels nice to know that you can now and not feel miserable.
Coins Spend-Path:
- Step 1: Staggering Slam 2 (50C)
- Step 2: Staggering Slam 3 (125C)
- Step 3: Blood Fervor 2 (50C)
Task Priority: Zero! Bloodthirst Amulet is Gromm’s Level 30 Equipment. After the change boosted his already-decent Staggering Slam to be super fast, this is still the best Equipment to get. Treat Gromm like a Stagger-bot and mess up as many turns as you can– and crit for 30 while you’re at it!
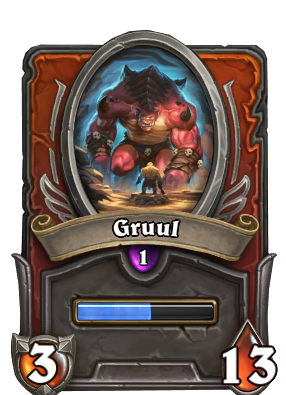
Gruul
Best Equipment: Dragon’s Skull (Task 7)
Coin Farms: The Anointed Blades (2.2), General Drakkisath (4.8)
Gruul remains playable in Mercenaries PvP for one reason: his Dragon’s Skull Equipment, which gives your team +5 Fire Resistance. People didn’t really realize that just having Gruul in play basically makes Diablo into a completely empty Mercenary, since Fire Stomp now tickles you for 1 each time it blasts. It took a while to get adopted, but there was a chunk of time where you could see a lot of Gruuls, and a lot of Gruuls winning.
Ultimately if your opponent isn’t playing Diablo (rare, I know) Gruul becomes useless. When more Dragons are incidentally floating around decks while Diablo is everywhere, Gruul will be at his best. But for now it seems that Gruul falls victim to a classic issue in CCGs: it tends to be better to play the good cards rather than counter the good cards.
Coins Spend-Path:
- Step 1: Dragonslayer Shot 2 (50C)
- Step 2: Dragonslayer Shot 3 (125C)
- Step 3: Dragon’s Skull 2-4 (100C+)
Task Priority: Medium– Task 7 is the place to be for Gruul to get your Dragon’s Skull Fire Resistance, but I can’t really recommend that you jam too hard to get it. Again, prepare yourself for some future Dragons to show up and Gruul’s time will come. But if you really want to beat Diablo, just become the better Diablo player.
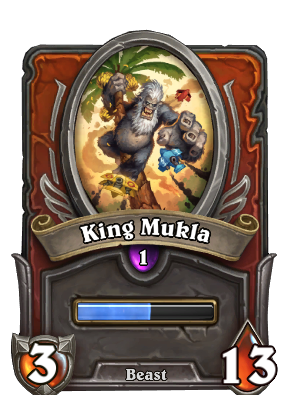
King Mukla
Best Equipment: Mukla’s Big Brother (Task 7)
Coin Farms: Corrupted Ancient (2.5)
King Mukla was being slept on– until everyone realized how sick Big Brother really is. Innovated during the weeks leading up to the Inn-vitational, Mukla showed up in a really cool Control build called “MAM”– Malfurion, Anduin, Mukla. (Did you know Mukla has Nature abilities? Pretty good with Liferoot Staff on Malfurion!)
The deck would use the Battlecry Monkey Bro to get in the way of Samuro while juicing up Anduin as quickly as possible, reaching some really insane 200+ Health states. Mukla obviously goes into Beasts with Rexxar and Krush, but it was really sick to see Mukla finally being recognized as another, or perhaps the secret best, “Turn 1 Taunt”.
Coins Spend-Path:
- Step 1: Primal Power 2 (50C) (As long as you’ve got a Beast too)
- Step 2: Primal Power 3 (125C)
- Step 3: Start upgrading Mukla’s Big Brother (100C+)
Task Priority: High– One of the best reasons to play King Mukla is Mukla’s Big Brother, his Task 7 Equipment that gives you a free taunt. Expect this to play an enormous role down the line, especially as more Beasts get printed. Unfortunately Mukla feels very, very medium without his brother, so his Task 7 is necessary for Mercenaries PvP.
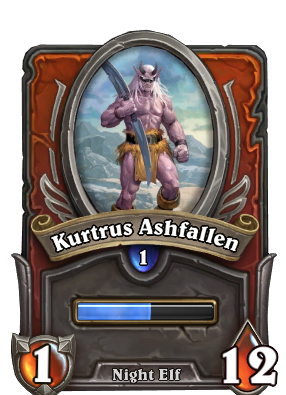
Kurtrus Ashfallen
Best Equipment: Chaos Amulet (Level 30)
Coin Farms: Plaguemaw the Rotting (1.8), Raven the Hunter (2.1)
Kurtrus is a funky boy because of his unique ability to Eye Beam, crit a Fighter, and heal for twice as much at the same time. Seeing basically no play at all after a week or so into the game, his true identity is still to be discovered.
My guess is that there are ways to value him as A) Diablo Hate but more importantly B) a guy with cool glasses. And those glasses shoot lasers and in a meta dominated by Fighters that could roll in at Position 4 (your opponent’s first Merc to sub in) or Position 5 (their second), Kurtrus could really shine as a counterpick.
Coins Spend-Path:
- Step 1: Eye Beam 2 (50C)
- Step 2: Eye Beam 3 (125C)
- Step 3: Chaos Amulet 2 (100C)
Task Priority: None– Being able to crit and heal for that crit value is very underrated, so I’d lean towards Chaos Amulet, his Level 30 Equipment. No Task-grind needed! His other Equipment angle at slaying the under-represented Demon tribe, and Fel Damage, another light-play tag.
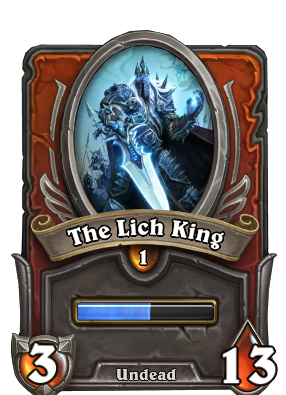
The Lich King
Best Equipment: Frostmourne (Task 7)
Coin Farms: Majordomo Executus (4.6)
The Lich King seemed very good, and then Patch 21.4 buffed him in multiple ways! He has a ton of good synergies and was “easy” to obtain via the Lich King Bundle. All of his Abilities are quite strong, so you can’t really go wrong.
Most Lich King builds involve opening with Mr. Freeze and simply using him to Frostmourne Slow down the entire enemy comp, even just once. This weird throwaway strat tends to just be a diversion– when paired with Jaina and Varden, there are suddenly too many threats to deal with. He used to die in one turn before he could even act against a lot of Double Caster openings, but now with Cookie’s Appetizers and a Maxed Lich King, he can almost always survive.
Coins Spend-Path:
- Step 1: Death Coil 2 (50C)
- Step 2: Death Coil 3 (125C)
- Step 3: Whenever you get Frostmourne, then: Frostbite 2+ (50C+)
Task Priority: Low, weirdly– Frostmourne is LK’s Task 7 Equipment and the highest upside. For the moment he’s still simply a diversion, so I would grind his Tasks last in his respective comps, as his allies’ items, like Vol’jin’s Task 7, are mandatory for success in Mercenaries PvP.
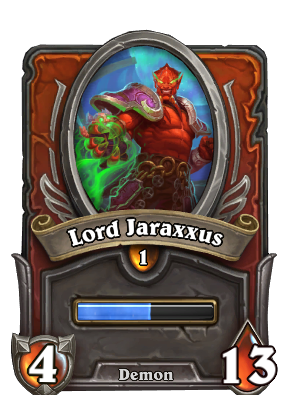
Lord Jaraxxus
Best Equipment: Amulet of Outrage (Level 30)
Coin Farms: Ahune the Frostlord (3.6), Razorgore (4.10)
Jaraxxus was unplayable and remains on the fringe, but he did receive one of the cooler buffs in the Cornelius patch. He can now summon an Infernal on no Cooldown! The only Summon in the game to be able to do this, stacking a new unit every turn at a relatively fast Speed is not to be trifled with. The Summons even have bonus Fel Damage on them!
The folks that try out the Demon Comps suggest opening with Diablo Rathorian and Mannoroth, which stinks for Jaraxxus, but there might still be time. One more Fel Spell payoff and Jaraxxus might even be able to hold his own without other Demons and just focus on being a unique summon-spewing-portal Merc.
Coins Spend-Path:
- Step 1: Legion Burst 2 (50C)
- Step 2: Fist of Jaraxxus 2 (50C)
- Step 3: Fist of Jaraxxus 3 (125C)
Task Priority: Low– Amulet of Outrage is his Level 30 Equipment and affects his most powerful ability: Fist of Jaraxxus. The Task 7 Equipment turns it into an execute, always targeting the lowest-health, but the verdict is still out on whether or not this is OP or just unnecessary. The patch did buff his Fist to do more damage and be faster, so this choice feels even better now.
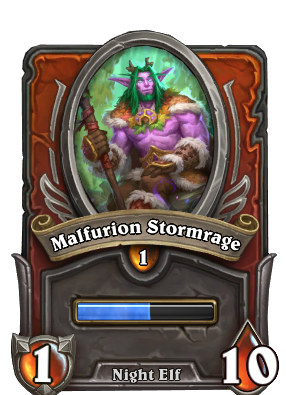
Malfurion Stormrage
Best Equipment: Liferoot Staff (Task 7)
Coin Farms: Fallen Guardians (2.3), Highlord Omokk (4.7)
Malfurion, like Jaraxxus and Alex, takes an entire comp idea and singlehandedly makes it playable. But unlike the other two, Malfurion has the whole weight of the Natural World behind him. There are, if anything, too many Nature Mercenaries to consider.
Do you jam Bru’kan and Guff? Brightwing and Samuro? Anacondra and Thrall? One of the most-fun Mercenaries to open and build around with an insane Task 7 Equipment to boot, Malf will always be great. He offers a Speed-Boost to all of your Nature spells, a Root that goes through Taunts, and a decent AoE (that can also be a super-heal!) in a pinch.
Nature Samuro, featuring Malf Bru and Samuro, popped up as an extremely strong deck, as did MAM with Anduin and Mukla. So far Malf looks to remain an evergreen staple in Mercenaries PvP, and as far as this Hearthstone Mercenaries Leveling Guide is concerned, he’s one of the best Mercs to clear PvE too.
Coins Spend-Path:
- Step 1: Cenarion Surge 2 (50C)
- Step 2: Entangling Roots 2 (50C)
- Step 3: Entangling Roots 3 (125C)
- Step 4: Cenarion Surge 3 (125C) (Prioritize this if you have a lot of Nature, but Entangling Roots is great in PvE)
Task Priority: High– Liferoot Staff is actually nutty. This Task 7 Equipment regularly determines if your Mercenaries live or die, as in Triple Nature lines you start cranking out healing on every ability. At max level this Equipment represents healing your team for over fifty every turn– for free!
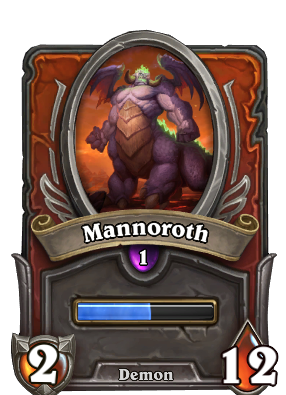
Mannoroth
Best Equipment: Pit Lord’s Staff (Task 7)
Coin Farms: Coren Direbrew (4.1)
Demons got some help recently, and though there aren’t any new ones, their numbers got a little better. Rathorian and Diablo are suggested to open up a Demons comp alongside Mannoroth, and you start stacking a lot of stats quite quickly. Rathorian adds Attack, Mannoroth adds Health– there’s something there, kind of. Whether you round out the backline with Orcs or more Fel or what isn’t exactly clear yet. Keep your ear to the ground for some future Hearthstone Mercenaries Leveling Guides that will give us a better understanding.
Coins Spend-Path:
- Step 1: Fel Lash 2 (50C)
- Step 2: Fel Lash 3 (125C)
- Step 3: Terror Charge 2+ (50C+)
Task Priority: Unfortunately Medium-High– Now that there were some minor Demon Buffs, it looks like Mannoroth might be best suited for pumping up your team’s health with Terror Charge. That means needing Pit Lord’s Staff, his Task 7, but is by no means a guaranteed-to-be-good comp, so tread Tasks carefully.

Mr. Smite
Best Equipment: Sharpened Scabbard (Level 30)
Coin Farms: General Drakkisath (4.8), Nefarian (4.13)
Mr. Smite came in our Pirate Mini-set but has yet to make real waves. The coolest part, as I mentioned in the Cornelius section, is that he’s part of a sick combo: Cornelius Blessing of Sacrifice + Smite Overboard + Rokara Offensive Rally. This ends up making your Smite go absolutely ballistic, attacking randomly and getting gigantic in exchange for using two other support Mercs. I learned this the hard way, but Entangling Roots doesn’t even stop this!
The funny part is that the counterplay is “just don’t do anything” so you don’t trigger Overboard, but now that opens up some hilarious mindgames where the Smite player doesn’t even go for the combo, other player just Passes, and you get to steal a whole turn. Realistic? Not really! Hilarious? Yes!
Coins Spend-Path:
- Step 1: Avast ye Matey (50C)
- Step 2: Overboard 2 (50C)
- Step 3: Overboard 3 (125C)
Task Priority: Zero– Sharpened Scabbard is Smite’s Level 30 Equipment, though it does require Pirate synergies. Even just one Edwin or Eudora or even Sky Admiral Rogers and the bonus Attack is enough. His other Equipment don’t offer anything crazy, so for now just hang tight. Smite could definitely have a future in Mercenaries PvP, though.
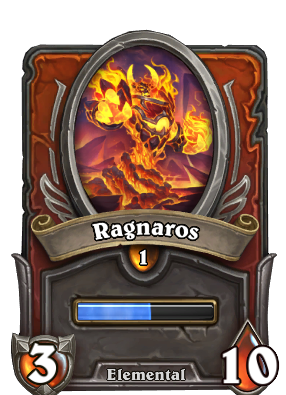
Ragnaros
Best Equipment: Sulfuras (Task 2)
Coin Farms: Avalanchan (3.3)
Ragnaros is really sweet but needs several expensive cards (Baron Geddon & Antonidas, Diablo, then extra spice like Alex/Voone, Tavish) to become complete. But don’t let that stop you– Fire Comp is good, smoking nearly all of the PvE without a sweat and was a very strong opener in the early days of Mercenaries PvP.
What Rag is really good for is being a 6th Position Protector that can one-shot Fighters that also come late in the game, like Diablo. A classic bench for a hot second was Cairne Diablo Rag, and is still more than fine to play. Apocalypse into Meteor guarantees some huge 70+ damage explosions out of nowhere!
Coins Spend-Path:
- Step 1: (As long as you have another Fire Merc) Magma Blast 2 (50C)
- Step 2: DIE, INSECTS! 2 (50C)
- Step 3: Magma Blast 3 (125C)
- Step 4: Meteor 2 (50C)
Task Priority: Medium– Sulfuras has overtaken the better Equipment slot on Rag for Mercenaries PvP. The Bonus Fire Damage from Blazing Rune is great if you go full Fire Comp, but a lot of the Cairne Diablo Rag backlines preferred flat Health and the option to Unfreeze instead. Mercenaries PvP has come a little ways since then and Rag has fallen off, but don’t worry as much about needing to jam to his Task 7 anymore.
(Fun Speedrunning Fact #53: DIE INSECTS!, at full rank, will one-shot a lot of PvE mobs. This lets you click one button and win, skipping all of the animations that a Second Round of Combat would normally take. This Hearthstone Mercenaries Leveling Guide used to advocate for Rag to clear Heroic Air Ele, but now that higher PvE content is better for Tasks or Coins, Rag got a little worse.)
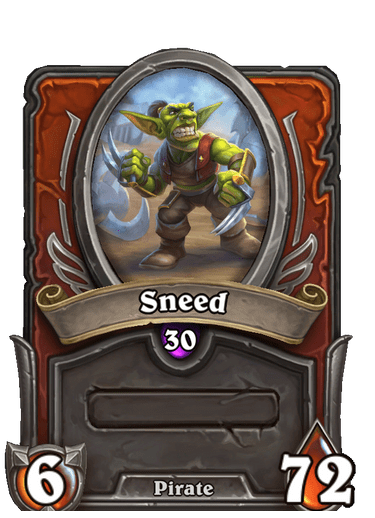
Sneed
Best Equipment: Extra Blades (Task 7)
Coin Farms: Rend Blackhand (4.9)
Sneed entered Mercenaries from the Deadmines but seems to have gotten lost. The list of Pirates that made their way into competitive certainly starts with Eudora, then Edwin, then Smite, and then finally Sneed.
Being a Protector has such a high cost associated with it– Blue guys melt you, and people love to play Casters in Mercenaries PvP. Sneed doesn’t really get to do anything crazy other than Cleave, and now even Gromm is better at that!
Sneed’s Disarm ability takes the Attack after you deal damage, so you don’t even get the upside of taking less from it, and Activate Saw attacks at random. Nothing about his kit is particularly exciting or innovative, so the best chance to meet him might be to play Classic WoW.
Coins Spend-Path:
- Step 1: Activate Saw 2 (50C)
- Step 2: Activate Saw 3 (125C)
- Step 3: Save up for Extra Blades 2-4 (100C+)
Task Priority: High but Low– Sneed desperately needs Extra Blades, his Task 7, to be a viable Merc and open up with a lot of bonus Attack. If you want to go ham with Edwin then maybe Sneed is the next-best Pirate to go alongside Eudora for your opener. But, for now, this Hearthstone Mercenaries Leveling Guide suggests you focus on your Eudora and Edwin Tasks, not Sneed.
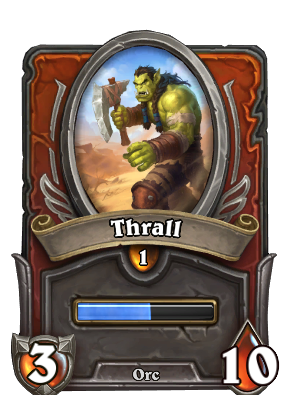
Thrall
Best Equipment: Doomhammer (Task 7)
Coin Farms: Ursula Windfury (3.4)
Thrall is part of the legendary “BTX” opener (that I may or may not have named): Blademaster Samuro, Thrall, Xyrella. His origin story began in the Mercenaries Discord with the realization that this trio, up against an unsuspecting opponent, literally one-shots a Fighter and a Caster on Turn 1.
Unfortunately, he takes a billion damage from attacking things– especially his favorite food, Fighters. Though a Protector that can represent up to 80(!) damage on Turn 1, he suffers from a lack of Defensives. Thrall often ends up just trading off 1 for 1, which doesn’t feel ideal. As Orcs get more flexible and safe options, Thrall might continue to slide off the map.
Coins Spend-Path:
- Step 1: Lightning Storm 2 (50C) (If playing with Samuro or Orcs, you can level For The Horde instead)
- Step 2: Lightning Storm 3 (125C)
- Step 3: Warchief’s Command 2 (50C)
- Step 4: Doomhammer and For The Horde to max (50C+)
Task Priority: Extremely High– Doomhammer is perhaps the most mythical item in the game. From a narrative perspective entering the very first meta to the actual numbers this weapon wields, Doomhammer is the spookiest there is.
Windfury allows for some of the highest individual DPS without spending a single Cooldown. The cool thing is that Thrall actually has good Nature AoE too and can see play along the way to Task 7, but you must get The Hammer to take full use of this Merc.

Trigore the Lasher
Best Equipment: Razorclaw (Task 2) Hearthstone Mercenaries Leveling Guide
Coin Farms: Razorgore (4.10)
Trigore is a brand new Beasty Boy released in the wave of Alterac Valley Mercs, and they definitely have some funky stuff going on.
Backlash, the latest and greatest Retaliation effect, has the unique text of simply shooting a Laser when your allies take damage, instead of Attacking back. Trigore won’t take damage in return, which was the most annoying part about Mercs like Varian and Smite. This is good news for the playability of that effect here, where the others are rarely strong enough in isolation since.
The other funky part about Trigore is this crazy Regrow Heads ability. They take Crit Damage from everything for a turn, but at the end of the next turn, they full heal. I misread this at first and realized that there’s a delay, taking “two” turns to heal, and might be too easy to play around. But, in a way, this makes Trigore into a “soft Taunt” that must be dealt with. Whether or not the community can leverage these bizarre abilities will be a unique trial!
Coins Spend-Path:
- Step 1: Frenzied Attack 2 (50C)
- Step 2: Frenzied Attack 3 (125C)
- Step 3: Backlash 2+ (50C+)
Task Priority: Medium– Trigore wants to get the Razor Claw Equipment, their Task 2, in order to get the most Attack possible and beef up Backlash. +9 Attack every turn is no joke! Since there’s no Cooldown, a simple rotation of Backlash every turn might be enough to see play. The next update to this Hearthstone Mercenaries Leveling Guide should have a better understanding of whether or not Trigore is good!
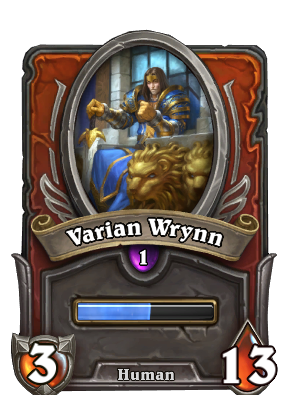
Varian Wrynn
Best Equipment: Shalamayne (Task 7)
Coin Farms: Icehowl (3.5)
To round out the Mercenaries Protectors we have Varian Wrynn, a great example of a Merc that would be unplayable if he had a worse Tribal Tag. But he doesn’t! Humans have plenty of support, almost like Nature in the way that there are too many Humans to choose from. Unfortunately, Varian still remains mostly unplayable in Mercenaries PvP.
Retaliation is a bizarre ability when you get down to it: it counters Fighters (I’m seeing a pattern) but it’s so easy to make completely whiff. A patch added more Attack to Retaliation every time it triggered, so now it does literally one-shot a Samuro in response to his Double Strike, but this trading of one-for-eh? just isn’t worth it.
Coins Spend-Path:
- Step 1: Heroic Leap 2 (50C)
- Step 2: Heroic Leap 3 (125C)
- Step 3: Splitting Strike 2 (50C) (Priority the more Attacking Humans you have. Pumps Varian by the way!)
Task Priority: Low– All of Varian’s Equipment are fine-good. Bounding Boots, his Level 30 Equipment, is the damage boost that, like always, can never go wrong. But Shalamayne is ideal, adding a flat +7 Attack, one for every Task you have to do… ouch.


That’s all there is– we hope you found this Hearthstone Mercenaries Leveling Guide for Protectors useful! Caster and Fighter guides are here. Until then if you have any questions you can find me on Twitch, where we’ll continue to answer all of your questions. Stay tuned here at esports.gg for more Hearthstone news, Mercenaries guides, and so much more.